Essential Maintenance and Troubleshooting Tips for Solar Power in Caravans and Motorhomes

Essential Maintenance and Troubleshooting Tips for Solar Power in Caravans and Motorhomes

Essential Maintenance and Troubleshooting Tips for Solar Power in Caravans and Motorhomes

A Victron battery monitor

Discover the freedom and independence of off-grid living with solar power systems for caravans and motorhomes. At Motorhome Solar, we specialize in providing a range of solar power products and services, including solar panels, batteries, charge controllers, and inverters. In this blog post, we’ll share with you some essential maintenance and troubleshooting tips to help you make the most out of your solar power system and keep it in optimal condition.

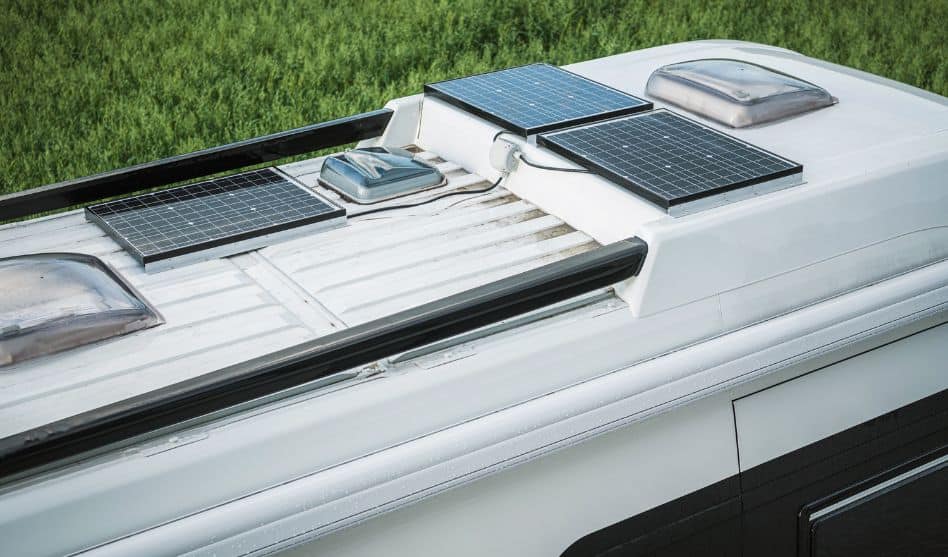
Routine Maintenance for Your Solar Power System

Ensure maximum efficiency and output by performing routine maintenance on your solar power system. Here are some tips to help you get started:

  • Clean solar panels regularly using a mild cleaning solution and a soft brush or cloth.
  • Inspect panels for any damage, such as cracks, scratches, or discolouration, and replace any affected panels promptly.
  • Check connections on solar panels, charge controllers, inverters, and batteries regularly and tighten any loose connections.
  • Inspect cables for signs of corrosion, fraying, or damage, and replace any worn or corroded connectors.
  • Monitor system performance and energy output regularly using monitoring tools and software.
  • Review your energy consumption habits and make small adjustments to optimize your solar power system usage.
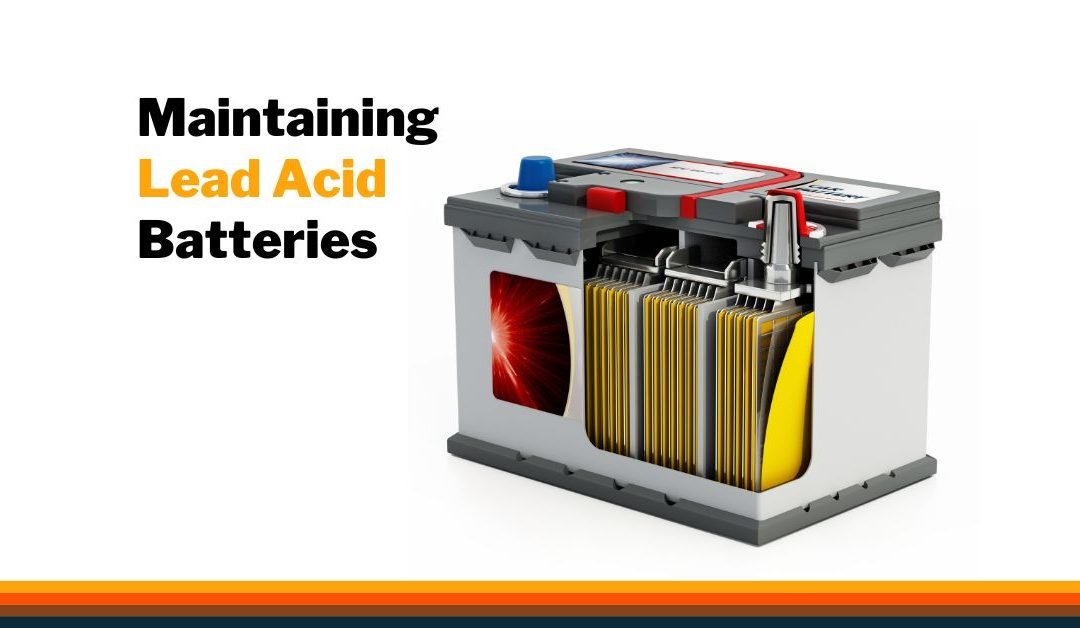
Battery Maintenance

Take good care of your batteries to ensure your solar power system’s longevity and performance. Follow these key maintenance tips:

  • Regularly check the electrolyte levels in flooded lead-acid batteries and refill them with distilled water if necessary.
  • Clean battery terminals and connections using baking soda and water to remove any dirt or corrosion.
  • Inspect batteries for any signs of damage, such as cracks, leaks, or swelling, and replace any affected batteries promptly.
  • Ensure proper charging by using quality charge controllers that are compatible with your battery type.
  • Monitor discharge levels to ensure you are managing within the batteries recommended SoC range.

Inverter and Charge Controller Maintenance

Ensure optimal performance and longevity of your inverter and charge controller by following these maintenance tips:

  • Install these components in a well-ventilated area, free from direct sunlight or excessive heat sources.
  • Periodically inspect them for any signs of damage, such as cracks, corrosion, or loose connections.
  • Stay up-to-date with the latest firmware and software updates from the manufacturer and install them as needed.
  • Regularly monitor their performance and output using built-in monitoring tools or third-party software.

Troubleshooting Common Solar Power System Issues

Here are some common issues you may encounter with your solar power system and tips on how to troubleshoot them:

  • Decreased energy output or efficiency: Check for dirty or obstructed solar panels, damaged cables or components, or shading.
  • Inverter or charge controller errors or failure: Check their connections, ventilation, and cooling, and consult the user manual or a professional for further assistance.
  • Battery issues, including undercharging or overcharging: Inspect batteries for any signs of damage, maintain proper electrolyte levels, and check charge controller settings.
  • Damaged or malfunctioning solar panels: Inspect panels for any damage, check their connections, and contact a professional for assessment and repair or replacement as needed.

When to Seek Professional Help

While routine maintenance and basic troubleshooting can often be performed independently, there are situations that require the expertise of a skilled technician.

These include complex issues with your inverter, charge controller, or batteries, damaged or malfunctioning solar panels, upgrading or expanding your solar power system, installing new components, or electrical issues that pose a safety risk.

To find a trusted solar power system technician, look for industry certifications, read reviews and testimonials, and ask for recommendations from fellow motorhome enthusiasts.

Need Help?

If you’re interested in experiencing the freedom and independence of off-grid living with solar power systems for your caravan or motorhome, contact the team at Motorhome Solar.

Whether you have specific questions about your system or need help troubleshooting an issue not covered in this article, our team of experts is here to help. Let us help you achieve your off-grid living goals – get in touch.

Lead Acid Battery Maintenance Essentials: From Flooded to Sealed Units

Lead Acid Battery Maintenance Essentials: From Flooded to Sealed Units

Lead Acid Battery Maintenance Essentials: From Flooded to Sealed Units

Maintaining a lead acid battery effectively is crucial for ensuring its longevity and optimal performance. This comprehensive guide focuses on the care of flooded batteries, AGM (Absorbed Glass Mat), and gel lead acid batteries. It’s worth noting that Lead Crystal has for the most part been phased out of batteries in the New Zealand market. For this discussion, we focus solely on lead acid batteries, covering flooded batteries, AGM, and gel types.

maintain lead acid batteries
maintaining batteries
flooded lead acid

Regular Inspection and Maintenance

To ensure optimal performance and longevity, regular testing and inspection of your battery are key. Conducting a routine inspection at least once a month can help maintain optimum performance and identify any issues before they escalate. When inspecting your battery, it’s crucial to check the battery’s state of charge, especially for deep cycle batteries. Utilizing a voltmeter for a precise reading or a hydrometer to assess the specific gravity of the electrolyte solution within the battery cells ensures each cell’s optimal performance. This proactive approach maintains the overall health and efficiency of the battery, and helps to avoid the potential costs and inconveniences associated with premature battery failure.

  • Ensure the top of the battery is clean, dry, and free from dirt. A dirty battery may discharge across the grime, potentially leading to performance issues.

  • Inspect terminals, screws, clamps, and cables for any signs of breakage, damage, or loose connections. These should be clean, tight, and free from corrosion.

  • Apply a thin layer of high-temperature grease to terminals and cable connections for added protection.

  • Look out for any physical damage or warpage on the battery case, which could indicate overheating or overcharging issues.

  • Explore what causes corrosion, shedding, electrical short, sulfation, dry-out, acid stratification, and surface charge

The Importance of Watering Lead Acid Batteries

Lead acid batteries are not only 100% recyclable but are also highly valued for their performance and durability, offered at a relatively low cost. Despite their origins in the late 16th century, lead acid battery technology continues to advance. Yet, the fundamental chemistry and operation have remained consistent. A lead acid battery consists of lead battery plates submerged in a solution made of 8% sulfuric acid. This setup is crucial for the functioning of both starter and deep cycle batteries. The interaction between the electrolyte and the battery cells facilitates the flow of electrical energy, enabling the battery to power various applications.

Flooded Lead Battery

A flooded battery is filled with liquid electrolyte, primarily consisting of  battery acid, via caps on the top of the battery. In a new battery, this fluid/electrolyte is 8% Sulphuric Acid (H2SO4) looking at the image on the right, you can see the grey battery plates inside the cell of the battery and the white cap on top. When required, electrolyte—a mixture of distilled water or battery acid—is poured in through the cap, and the cell is topped up until the battery plates are completely covered.

The cells do not need to be filled to the very top. It is important with flooded batteries that the electrolyte level is checked regularly, monthly is a good guide. There are also auto fillers that can make life easier if the batteries are in hard-to-reach locations. Ensuring that the electrolyte levels are maintained is crucial to avoid damaging the batteries and ensure their longevity.

Ensure Distilled and De-ionized Water is Used for Battery Maintenance

A common question we get asked is what is best to use to top up a flooded battery, with rainwater a commonly queried. Distilled water or demineralized water are the only two top-up options; tap water or rainwater should only be used in an absolute emergency, this is because rain and tap water are full of minerals and if used continuously the life of the batteries will be shortened due to this mineral presence.

Flooded batteries emit hydrogen and oxygen gases to the surrounding atmosphere during the charging process. This gas is highly flammable. So flooded batteries should not be stored inside the motorhome or caravan. They should only be kept in an external locker that is well ventilated. It is worth noting that the harder the batteries are worked, the more hydrogen and oxygen gases they release and the more electrolyte they will require. These flooded batteries should be installed in the orientation shown in the images, standing on their base only, as electrolyte will be spilled if tipped on their side.

VRLA Batteries (these include AGM, GEL, and Lead Carbon)

Ensuring all the batteries in a VRLA battery bank, often configured for higher power requirements, maintain their structural integrity and chemical balance is crucial. VRLA batteries don’t possess any free liquid electrolyte. In AGM batteries , the electrolyte is absorbed into fiberglass mats, a method also employed by Lead Carbon batteries. Gel batteries use a gelified electrolyte, providing stability and reducing leakage risk. 

Despite their sealed appearance, all VRLA batteries incorporate a gas valve venting system, a safeguard against the dangers of overcharging and subsequent gas emissions. Under normal conditions, these VRLA batteries generate little to no ‘gassing’. A crucial aspect of maintaining these batteries is ensuring the charging regime aligns with the manufacturers’ specifications, as overcharging can lead to excess gassing and significantly affect battery performance.

sulphuric acid vent hole

For some VRLA batteries, the vents are not visible, and these batteries can be installed on their base, side, or end. Other VRLA batteries such as the Varta have a vent hole in both ends of the battery. These batteries should be equipped with a fitting and tube that is installed in one end, and a cap inserted in the other end. If the battery is inside a motorhome or caravan, the tube should lead outside. These batteries with vent tubes can be positioned in various ways. An essential part of battery maintenance for VRLA types involves ensuring the correct battery charger settings to prevent overcharging, which can significantly shorten the life of the battery.

If the battery is installed inside the motorhome or caravan, the tube should be routed to the exterior of the vehicle. These VRLA batteries with vent tubes can be installed on their base or side. With all VRLA batteries , it is impossible to “top-up” the electrolyte. This is important to note, and imperative to understand if these batteries are overcharged and capacity is lost, that capacity is gone and cannot be replaced. VRLA batteries are maintenance-free and make up the majority of all installed house batteries. But recapping, it is imperative their lead acid batteries charge settings are correct to get the maximum life from them.

Regular Cleaning and Storage

Regular cleaning and storage are crucial for preserving your batteries’ performance and lifespan. It is recommended to routinely use distilled water to clean the battery top, which helps to prevent discharge and avoid grime buildup that can lead to performance issues. Along with cleaning, inspecting connections for any signs of damage or corrosion is vital. For batteries used in seasonal applications or stored for long periods, fully recharging the battery before storage is critical. Monitoring the charging state and utilizing the correct battery charger when necessary are essential practices for maintaining the battery’s condition during dormant periods.

Understanding Battery Life Phases

A lead acid battery progresses through three life phases:

  • Initial formatting,
  • peak capacity,
  • decline.

Step-By-Step Watering Procedure

  • Open the vent cap to inspect the filling well and check the electrolyte levels. The minimum required level is usually indicated on the plate inside.

  • If necessary, add just enough water to immediately cover the plates. It’s crucial to only add water when the batteries are fully charged (refer to the charging section for guidance).

  • After completing the process of charging, open the vent cap again to check the levels in the filling holes. Add water until the electrolyte level is about 1/8 inch below the top of the filling well.

  • Using rubber as a dipstick can safely help you gauge this level accurately.

  • Finish by cleaning the vent caps, replacing them if necessary, and securely tightening them to ensure a proper seal.

Lead Acid Battery Maintenance FAQs

How Does Temperature Impact Battery Watering?

Temperature significantly influences the evaporation rate of the water in the electrolyte solution, affecting battery maintenance routines. In hot climates, the rate of water loss increases, necessitating more frequent checks and top-ups to ensure the electrolyte covers the plates. Conversely, in cooler conditions, water evaporation slows, reducing the frequency of watering. It’s advisable to inspect battery water levels more regularly in warmer environments to maintain optimal battery health and performance.

Should I Add Distilled or De-Ionized Water Before or After Charging Lead Acid Batteries?

It’s best practice to add distilled or de-ionized water after fully charging the battery. Charging increases the electrolyte’s volume, and adding water before charging can lead to overwatering and potential overflow. Ensuring they are properly charged before adding water maintains the right electrolyte balance and prevents damage.

How Do You Keep a Lead Acid Battery Healthy?

Maintaining a lead acid battery’s health involves several key practices: employing the correct techniques to charge lead acids, utilizing equalization charges for flooded batteries, managing temperature conditions, avoiding deep discharges, and preventing sulfatation. These measures help ensure the battery operates efficiently and extends its service life.

Is an Automatic Battery Water Filler System Worth the Investment?

Deciding whether to invest in an automatic battery water filler system is a common consideration in lead acid battery maintenance. Such a system, designed for use with AC chargers, simplifies the task of adding distilled water by ensuring even distribution and preventing overcharging. This setup not only saves time but also eliminates the need for manual water level checks, making it an efficient tool for maintaining optimal battery performance.

Looking for ways to ensure your lead acid battery serves you well for years?

We understand the value of reliable power for your adventures. If you’re seeking advice or have questions about maintaining your motorhome’s battery, our knowledgeable team is here to assist. We’re not about the hard sell; we’re here to provide the guidance you need to make informed decisions. Connect with us today for practical tips and support tailored to your needs.